Getting Started Tutorial
Written by: Piotr Klukowski
Published: July 29, 2024, 10:03 a.m.
In this tutorial, you will learn how to:
- Create a new NMRtist project
- Add experimental data to the project
- Execute one of the NMRtist applications (i.e. ARTINA structure determination)
- Access the application results
Prerequisites
To proceed with the tutorial, you don't need to have NMRtist account, although we advise having one if you plan to use the system regularly. If you don't have your own experimental data, this tutorial can be completed with one of our example datasets:
- Dataset 1: 109-residue β-barrel protein [download data]
- Dataset 2: 134-residue 3-layer (αβα) sandwich protein [download]
- Dataset 3: 140-residue α horseshoe protein [download]
- Dataset 4: 99-residue 2-layer (αβ) sandwich protein [download]
- Dataset 5: 97-residue 2-layer (αβ) sandwich protein [download]
- Dataset 6: 99-residue 3-layer (αβα) sandwich protein [download]
- Dataset 7: 83-residue 2-layer (αβ) sandwich protein [download]
- Dataset 8: 101-residue protein in complex with RNA [download]
-
Step 1: Prepare input data
In this tutorial, we will execute the ARTINA application, which performs end-to-end automated protein structure determination. ARTINA requires as input only the protein sequence (one letters code) and processed NMR spectra (Sparky, Bruker, XEASY and NMR Pipe formats are supported). Since our example datasets use Sparky data format, it will be used as default in this tutorial.
In the first step, prepare all required input files for ARTINA, such that they are easily accessible later. A local directory listing of example input files is presented in the Figure 1.
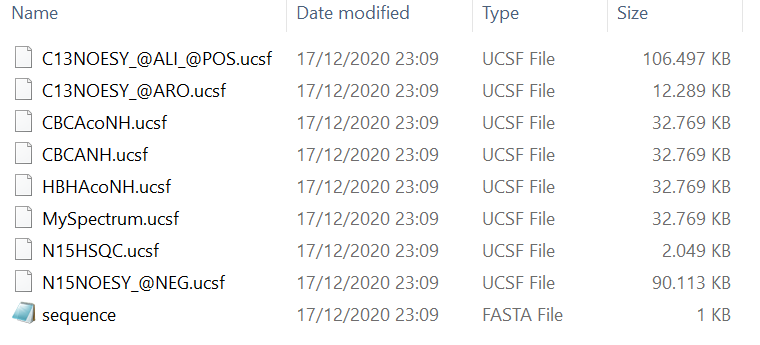
Figure 1
Some spectrum filenames correspond to the actual NMR experiment types. In such cases, NMRtist automatically recognizes the experiment type. Otherwise, this information must be provided manually. This process will be demonstrated later in the tutorial using MySpectrum.ucsf as an example.Additionally, some spectra have special tags in their filenames (e.g. @ALI, @ARO, @POS). These tags provide additional information about the spectrum. You can find more about their meaning in the NMRtist dictionary. The underlying logic is the same as for spectrum types. If tags are provided in the filenames, they are recognized automatically. Otherwise, this information must be provided manually.
-
Step 2: Create NMRtist project
NMRtist projects are means to organize NMR data within the system. Each project is permanently bound with a single fasta sequence, which cannot be changed after the project has been created. It is possible to have several projects with the same sequence (e.g. for datasets recorded under different experimental conditions).
To create a project, use the "New Project" button available in the top menu:

and fill the "New Project" form with the following data:- Project name: An abritrary name that will allow you to recognize this project later within the NMRtist system (e.g. "Getting started tutorial")
- E-mail: Required only for unregistered users. NMRtist will use this e-mail address to send a link, by which the project to be accessed.
- Project type: Select "Protein monomer".
- Sequence: One-letter codes of amino acids (e.g. copied from the FASTA file prepared in "Step 1")
- Sequence offset: ID of the first residue in the sequence
The "New Project" form, filled with exemplary data, is presented in the image below:
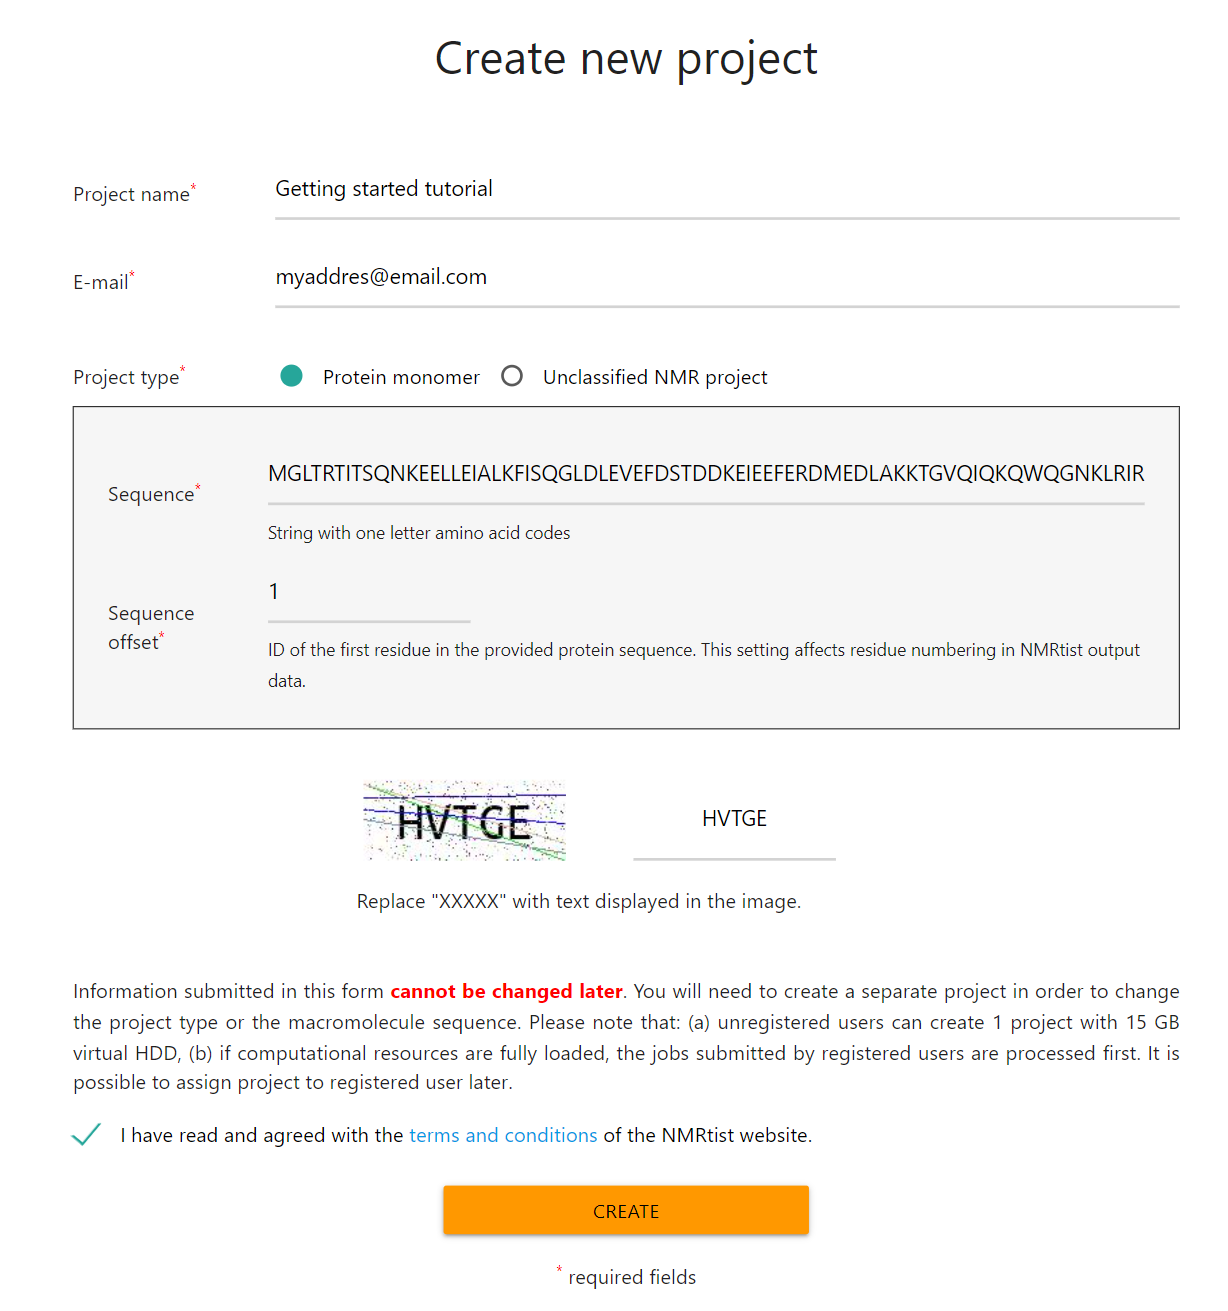
(click image to open in full scale)
Finally, submit the "New project" form by pressing the "Create" button.
- If you are a registered NMRtist user, you will be redirected to the page that lists all your projects (including the newly created one). Click the "Open" button next to the "Getting started tutorial" project.
- If you are an unregistered NMRtist user, you will receive an access link by e-mail using the address provided in the above form. Visit the link to continue with the tutorial.
-
Step 3: Add experimental data to the project
At the moment, the newly created project contains no experimental data:
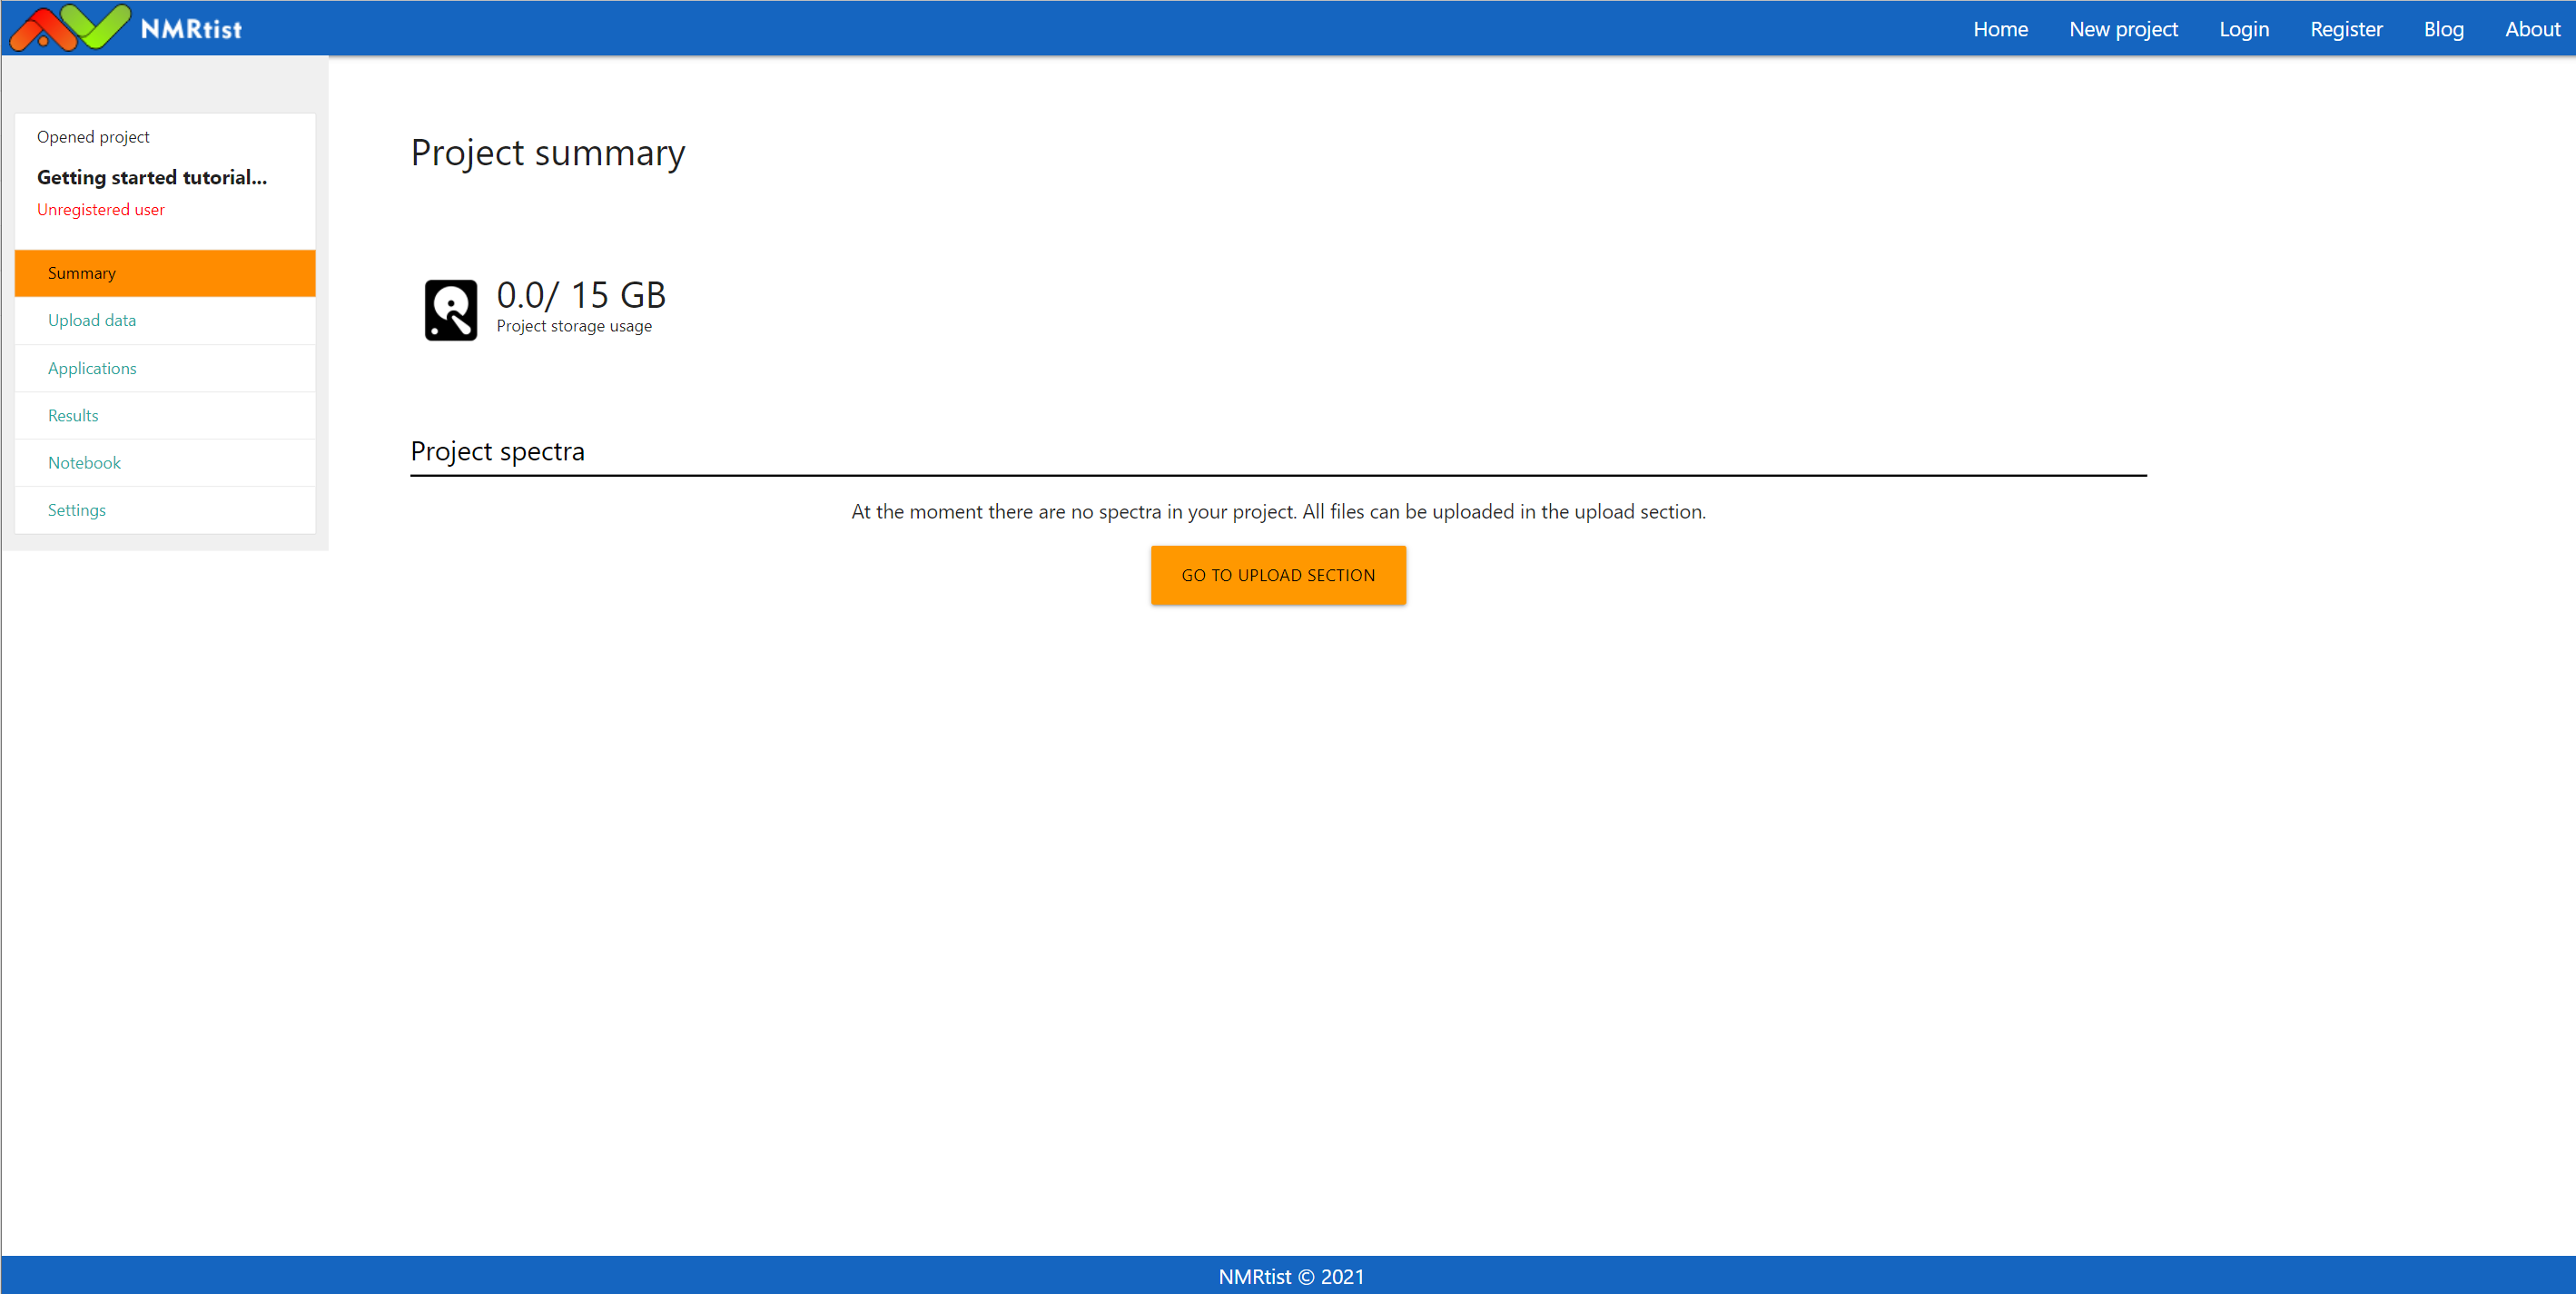
(click image to open in full scale)
In order to add new data, go to the upload page by visiting the link "Upload data" from the left menu. You will be redirected to the following page:

(click image to open in full scale)
Simply drag all your Sparky spectra, and drop them in the blue upload area to start the data transfer. Do not leave the page while files are being uploaded! You can find information about other supported formats in the NMRtist dictionary.
After the upload is completed, the page should resemble the image below:
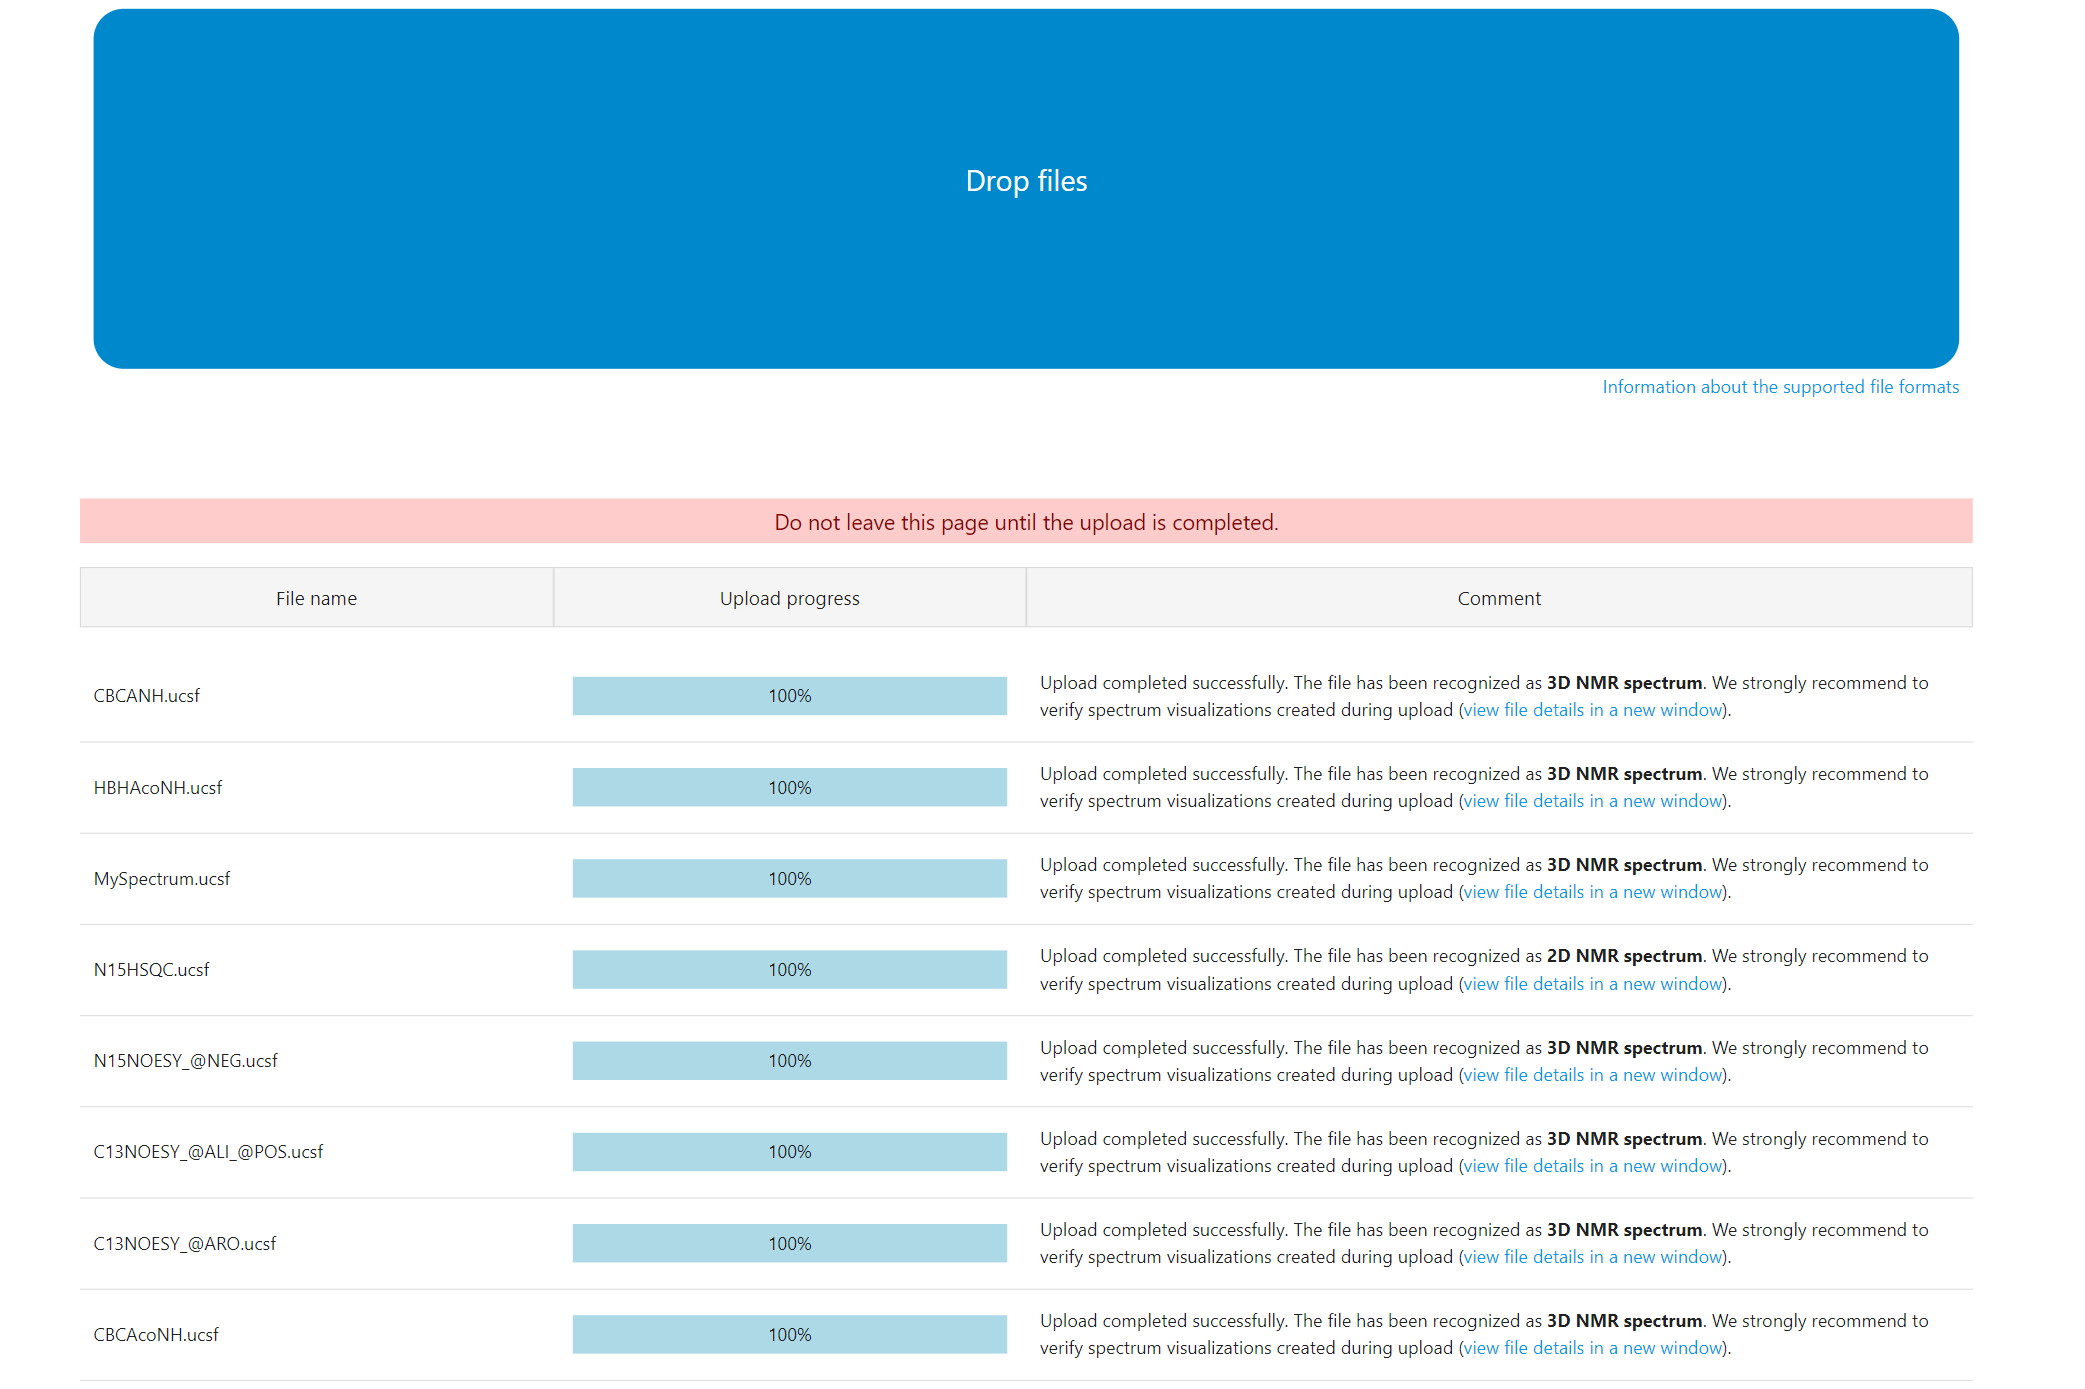
(click image to open in full scale)
Note that NMRtist provides immediate feedback about each uploaded file, describing the recognized file type, spectrum dimensionality and details related to format conversion. -
Step 4: Specify spectra metadata
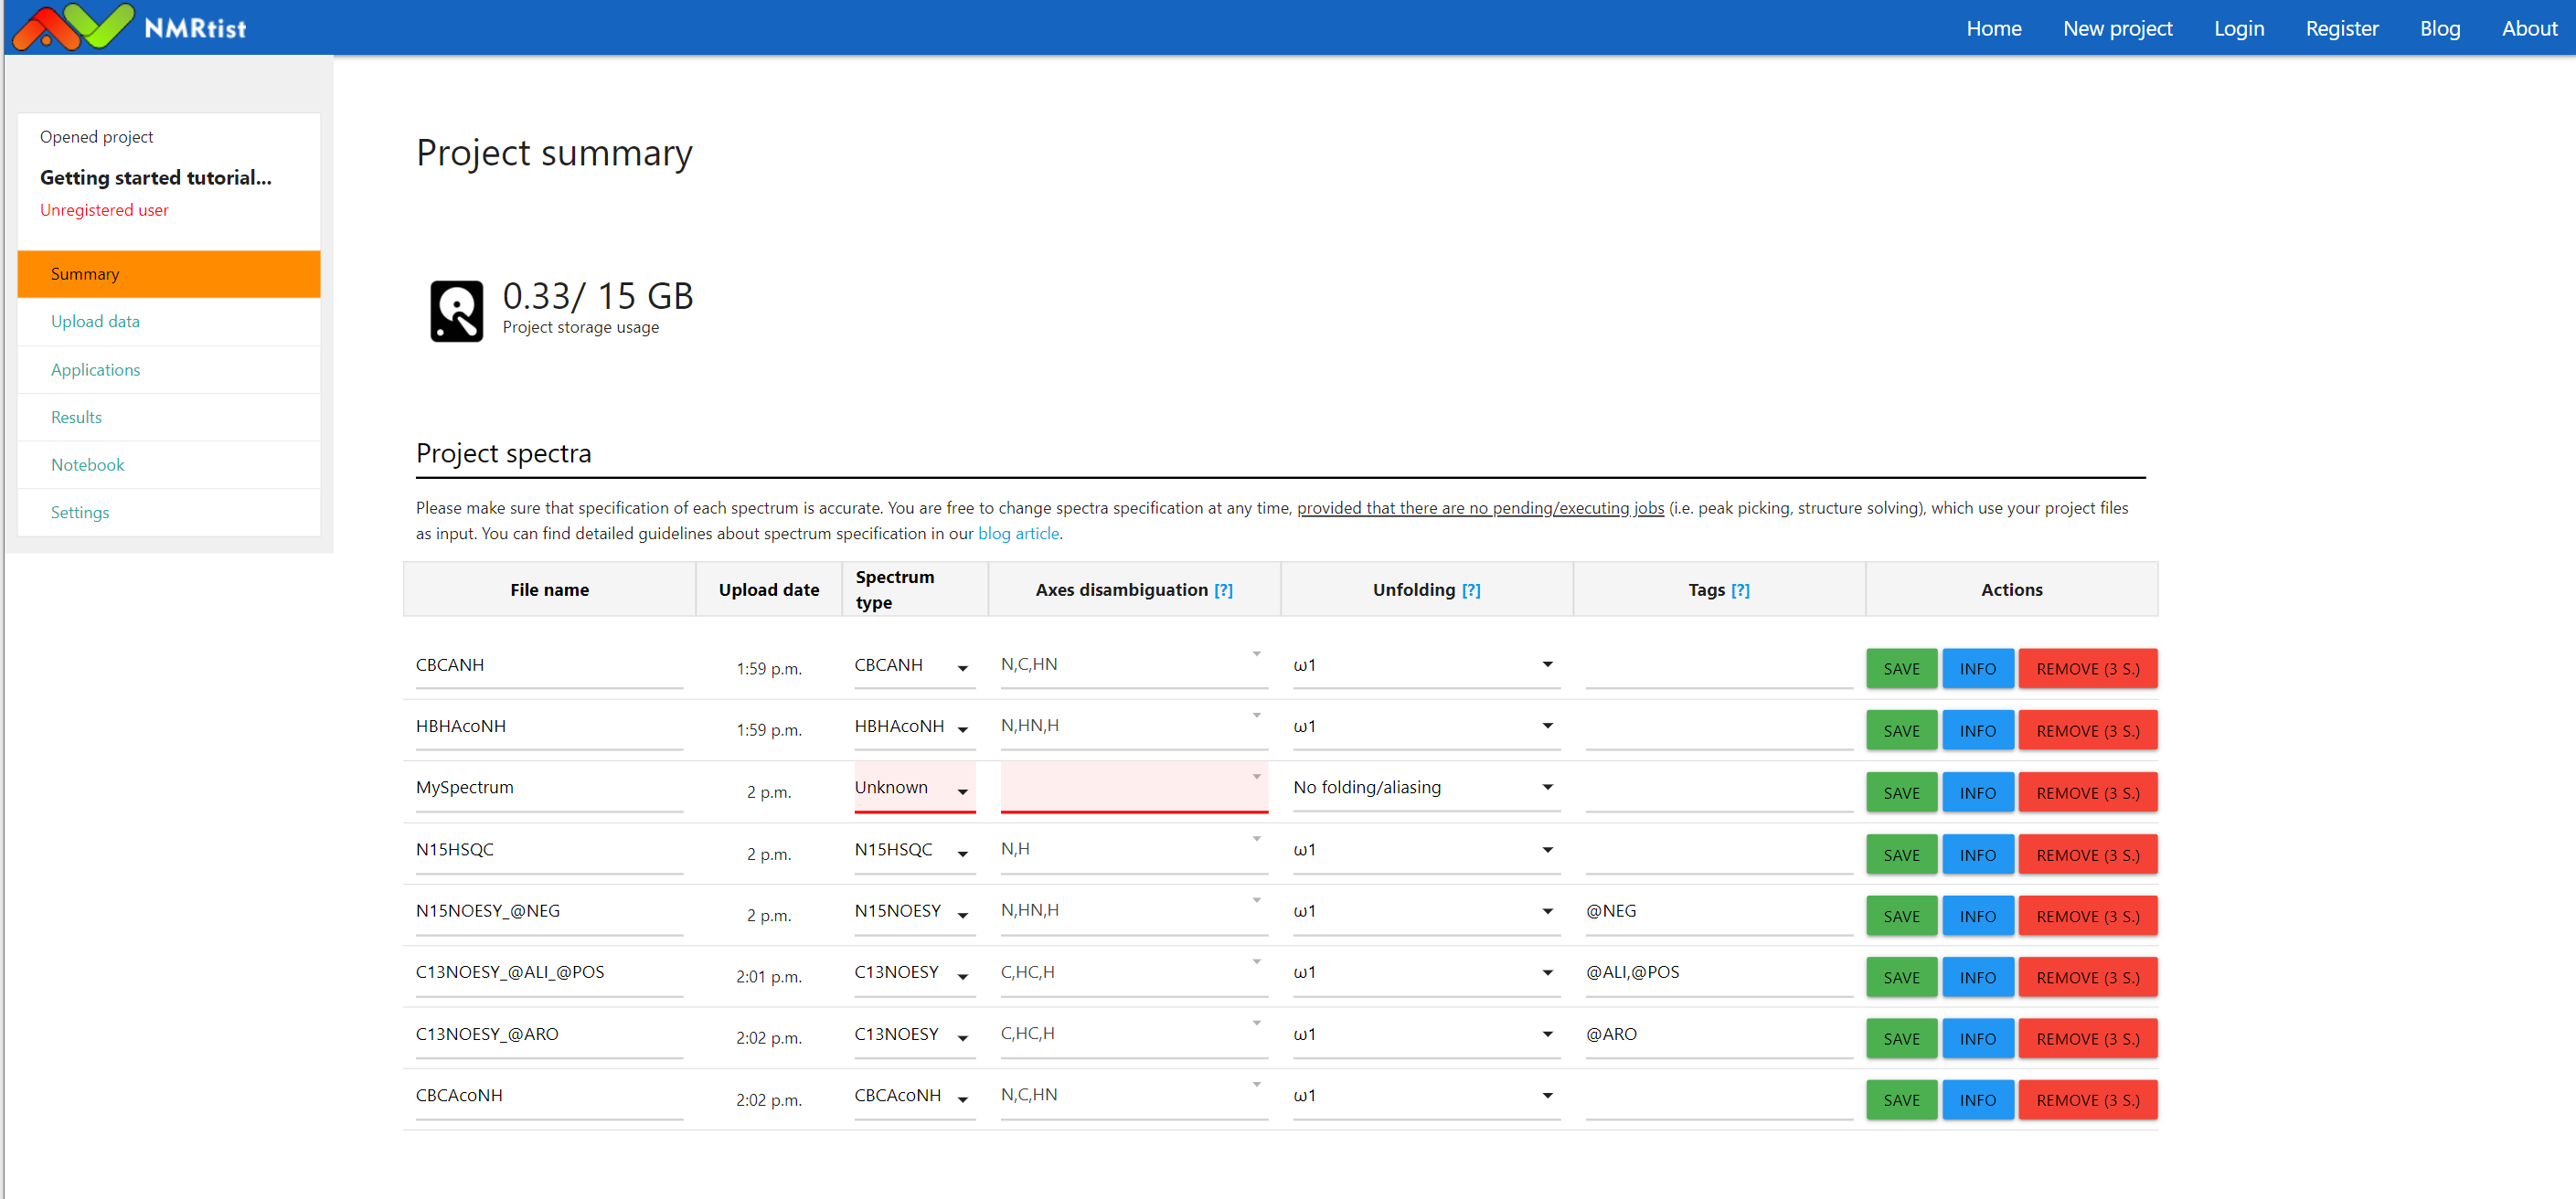
Before running any application, you must specify the metadata related to the uploaded files, such as the spectrum types and the axes order. You can do this conveniently using the interface available in the "Project storage" (visit the "Storage" link in the left menu). The interface displays all files uploaded to the project:
(click image to open in full scale)
The figure above presents our "Getting started tutorial" project with 8 newly uploaded spectra. Note that in 7 out of 8 spectra, NMRtist automatically recognized the experiment type, spectrum axes, and tags, based on the filename. The metadata of "MySpectrum" couldn't be automatically determined. Therefore, the table cells with missing information are highlighted in red. If you use example datasets, downloaded from the NMRtist website, all metadata should be recognized automatically.In case you need to provide the metadata for your spectra, the following information is required:
- File name: An arbitrary name used to recognize the spectrum later in the application output
- Spectrum type: NMR experiment type (select from the list of supported experiments)
- Axes disambiguation: Order of axes in the spectrum file (select from the list of available permutations). If you have doubts regarding axes order in the uploaded file, click the "Info" button to access spectrum visualizations and file header information. Note: You might want to open Info in a separate web browser tab to keep changes in the "Project Storage" intact.
- Unfolding: The dimension in the uploaded file, which has been folded during the measurement (if available). In case folded signals differ in signal amplitude sign from unfolded ones, use the appropriate option from the dropdown menu. More information is available in this article.
- Tags: Additional information about the spectrum (optional field). More information is available in this article.
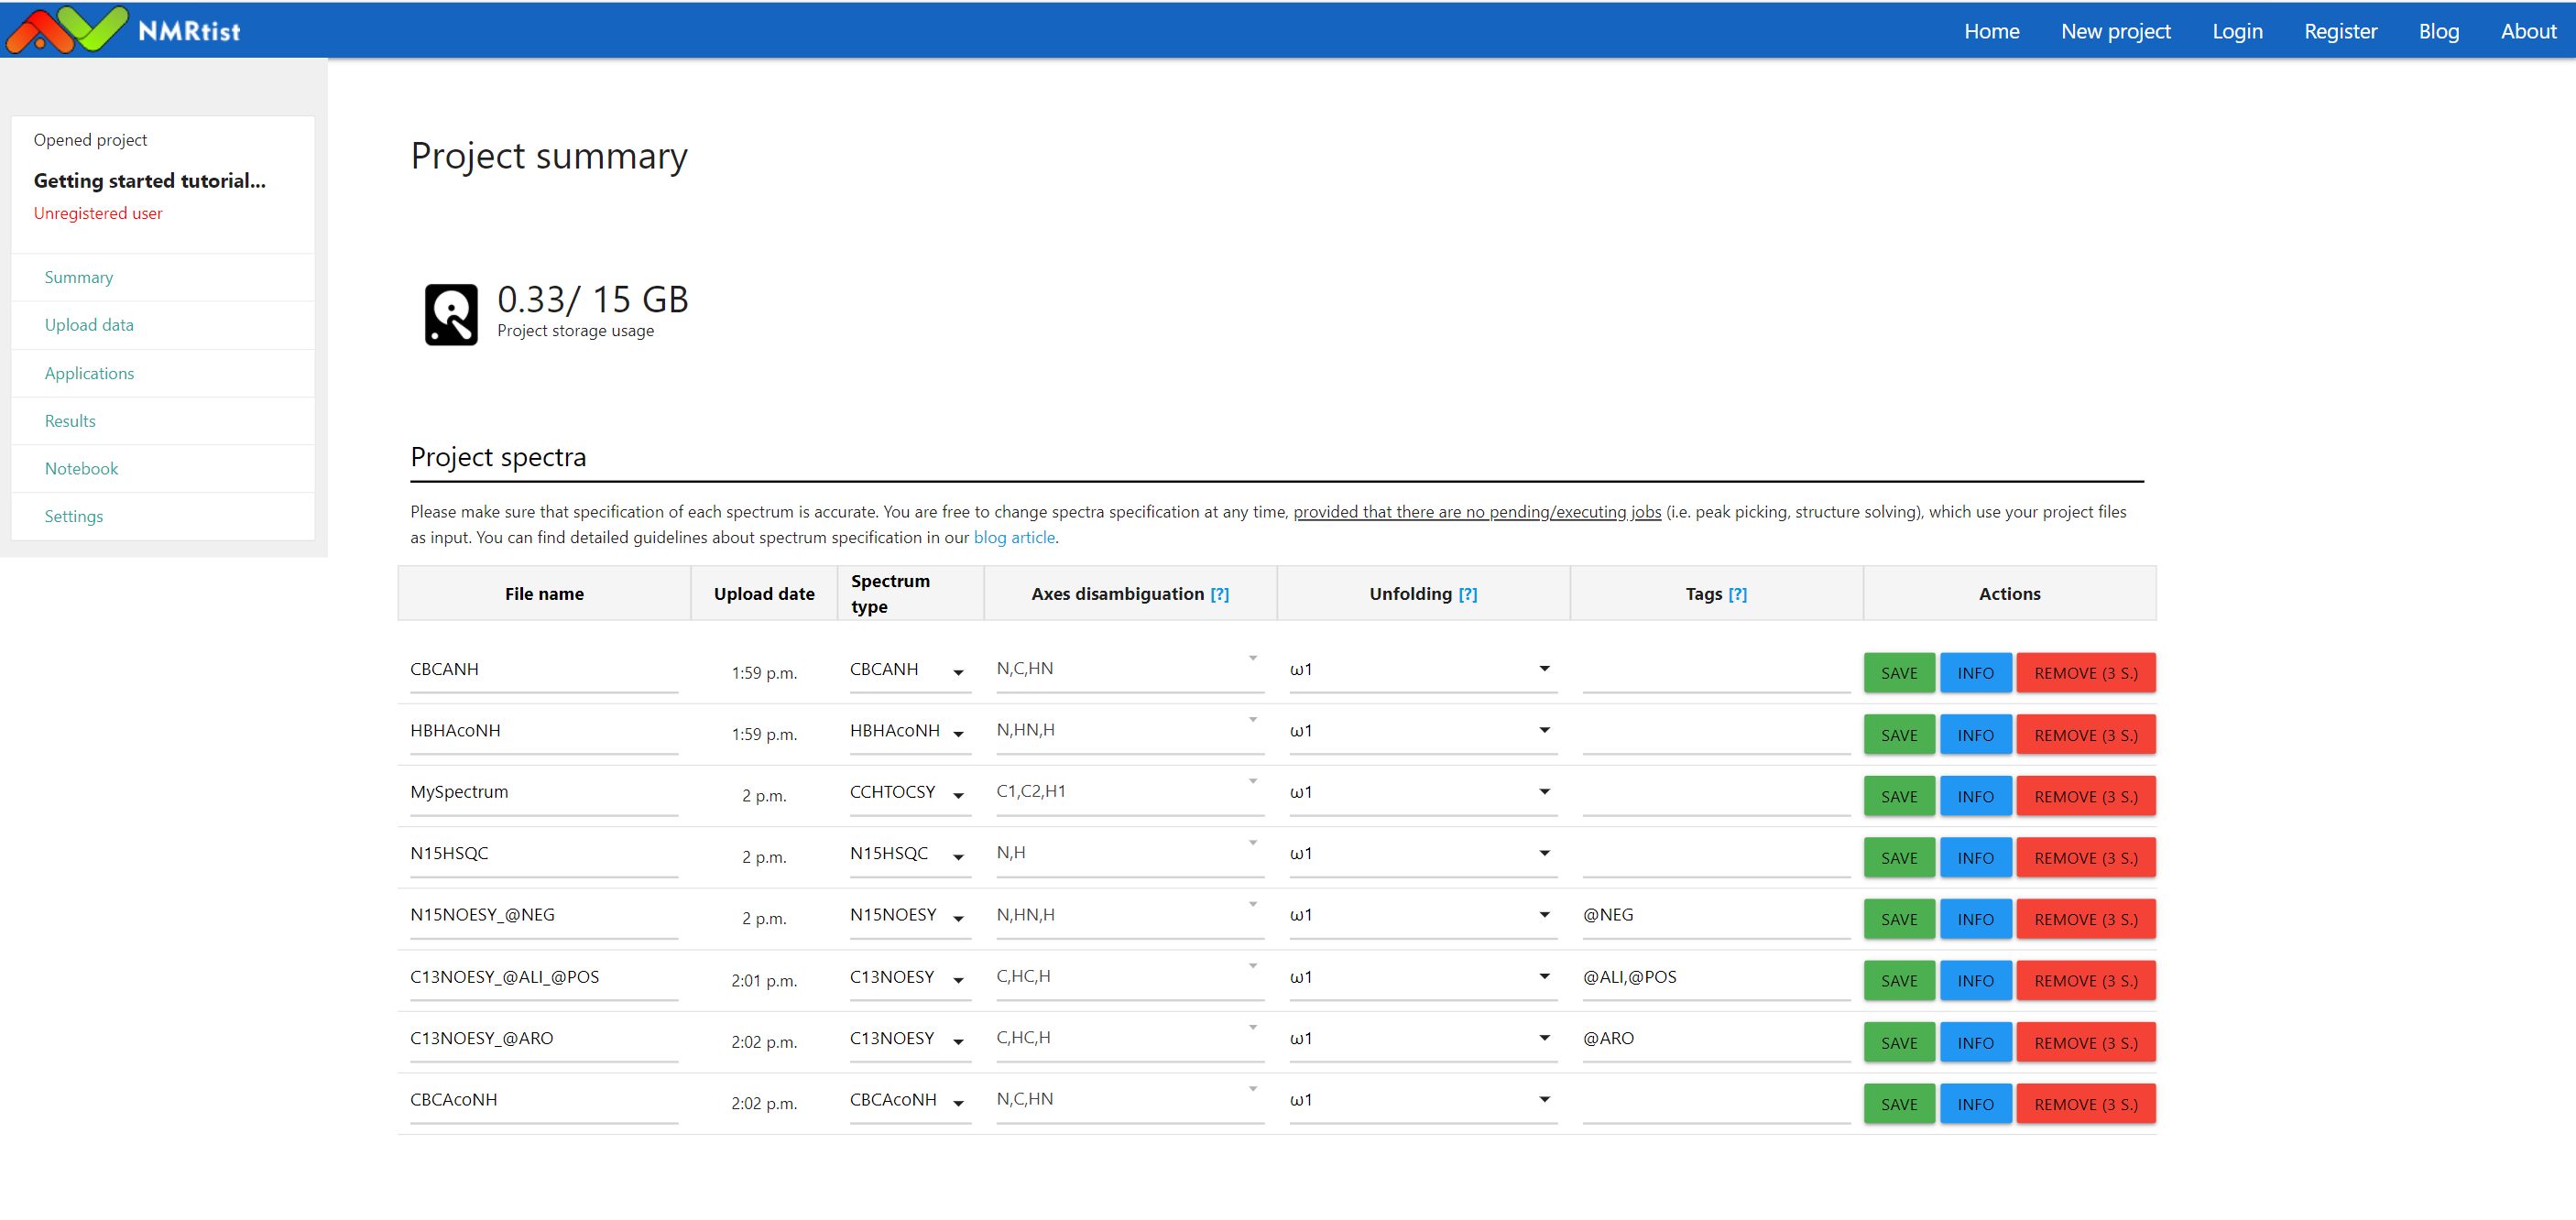
After filling in the missing information, the "Project Storage" doesn't report problems anymore
(click image to open in full scale)
-
Step 5: Run NMRtist application
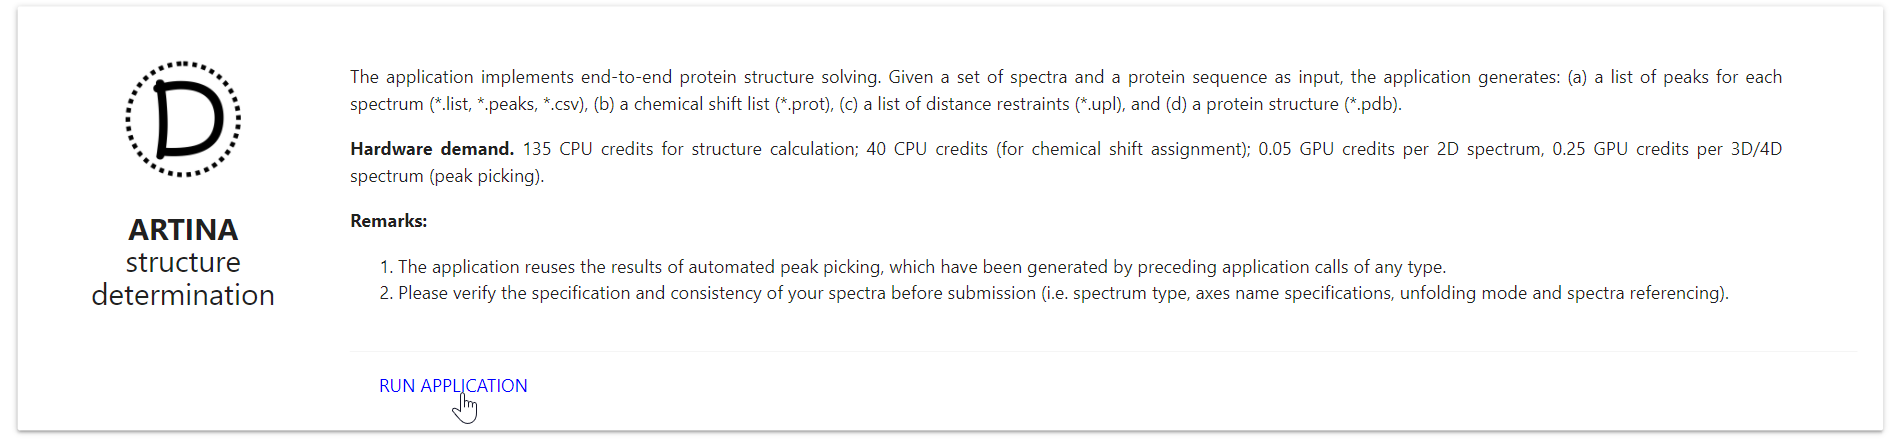
Once spectra are properly added to the project, they can be used as input for NMRtist applications. Available applications are listed on "Applications" page, accessible through the left menu:
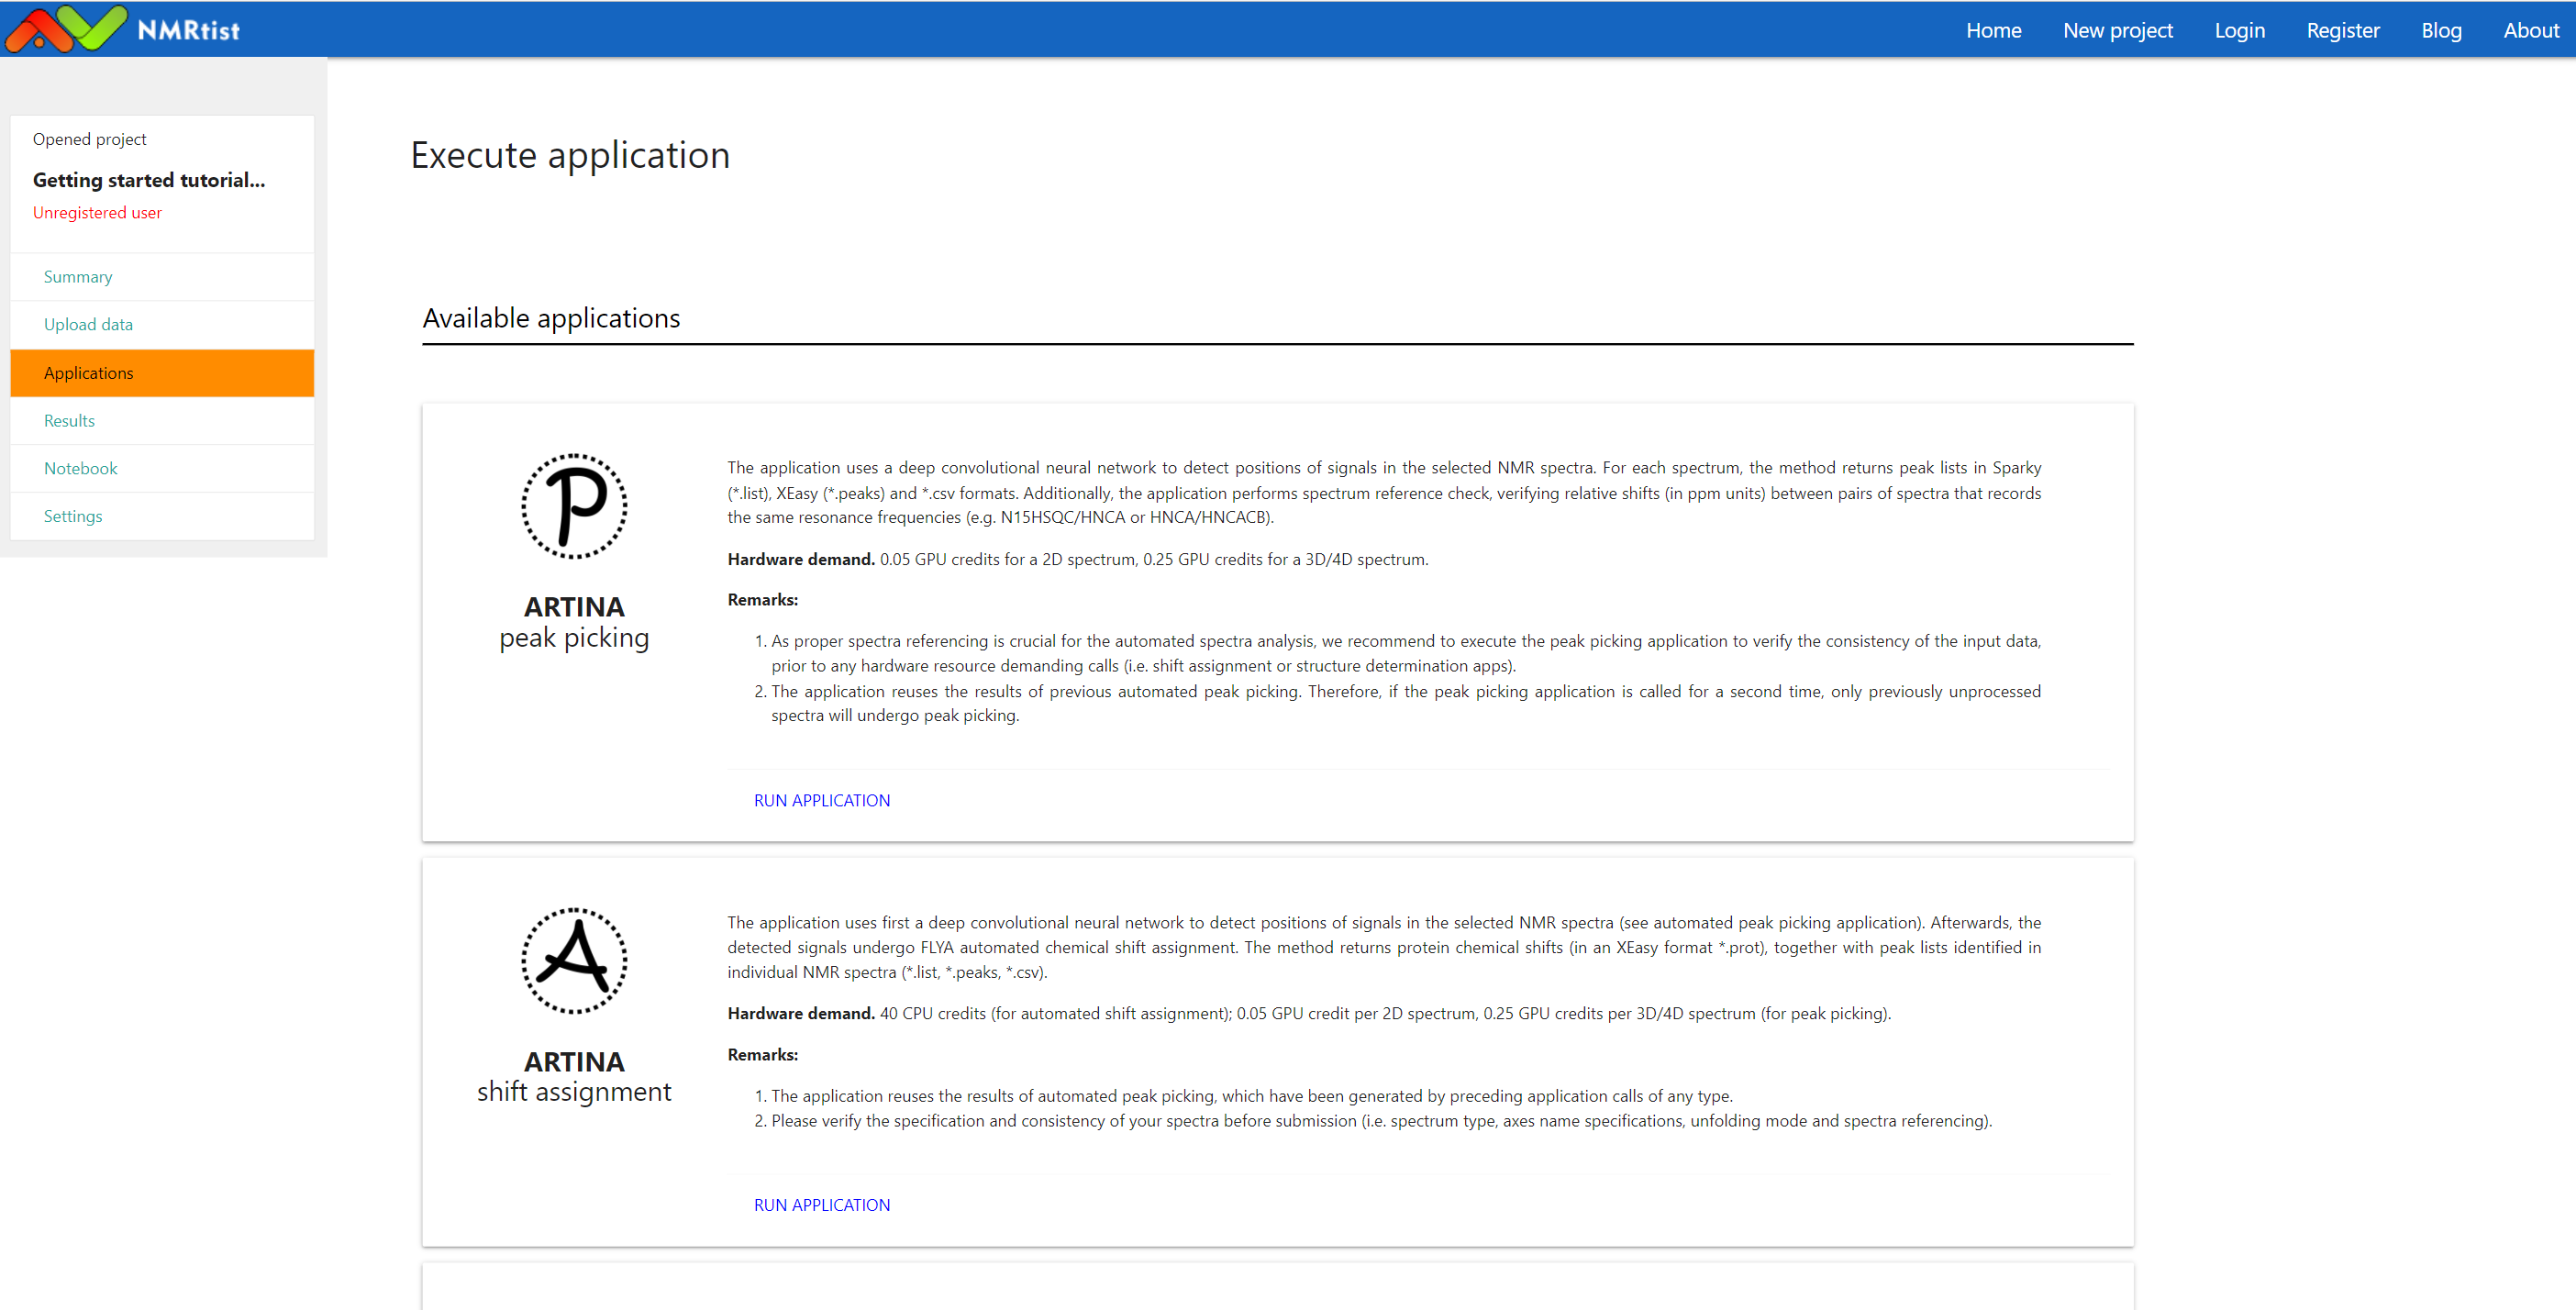
(click image to open in full scale)
To prepare an application call, press "RUN APPLCIATOIN" next to the name of the chosen application:
(click image to open in full scale)
Subsequently, specify the input data for the application call:
- Application call name: An arbitrary name used to identify this application call
- List of input spectra: The list of spectra that are used as input for the application call
- Application mode: Use "Test run" to execute the application with minimum hardware resources (useful for preliminary runs with new data), or "Regular run" for full-scale calculation.
The exemplary application call definition, with all spectra used as input, is shown below:

(click image to open in full scale)
Once the "SUBMIT JOB" button is pressed, your job will be submitted to the system queue, where it waits for the computational resources. Note that each application call is associated with a certain cost, expressed in CPU and GPU hours, that is used to prioritize application calls. Under heavy load, NMRtist will execute jobs in the order, which is defined by the number of CPU/GPU hours used by a user within the last 30 days.
To track the status of your application calls, visit the "Results" page using the link available in the left menu:
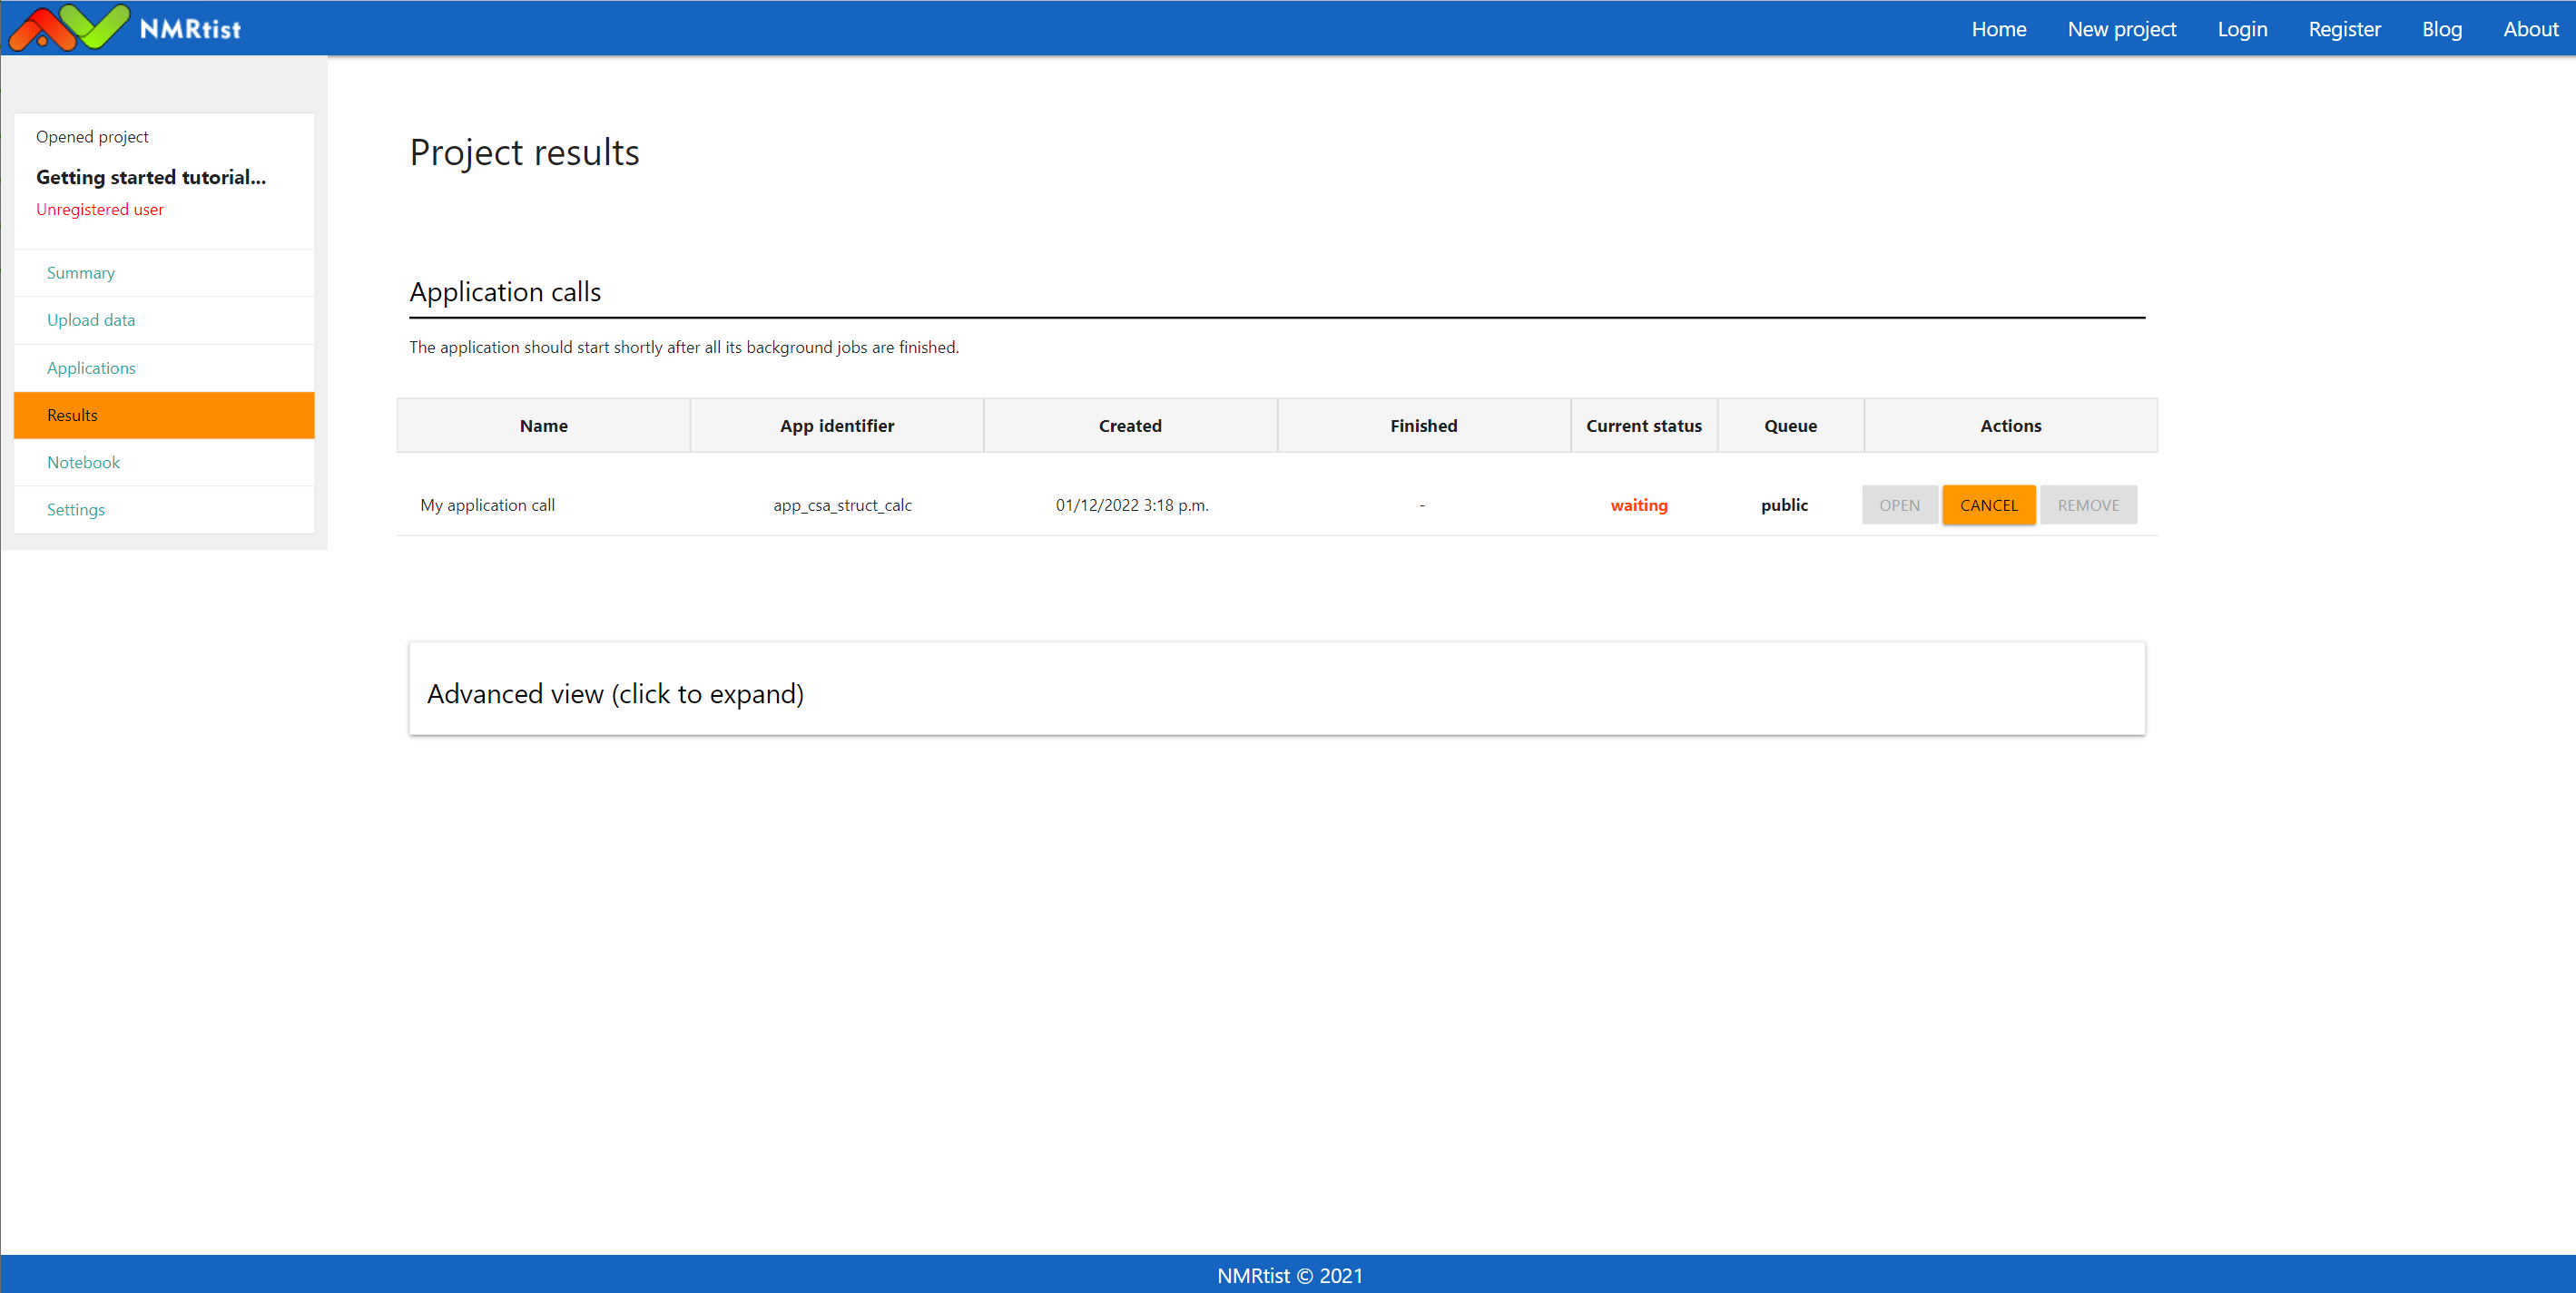
(click image to open in full scale)
This is the end of the tutorial. If you have managed to submit an application call, it will be processed soon by NMRtist. Once your job status changes to "Finished", you will be able to access its results using the "Open" button.